FINISHED MEASUREMENTS
- Approx. 7 inches tall by 3.5 inches wide
MATERIALS
- Worsted weight yarn: light green and dark green
- Size G/4.25mm crochet hook
- Pair of 9mm safety eyes
- Black embroidery floss and small embroidery needle
- Polyester fiberfill stuffing
- Yarn needle
- Scissors
- Stitch marker
ABBREVIATIONS
- Mr – Magic ring
- R – Round
- Sc – Single crochet
- Sts – Stitches
- Inv Dec – Invisible decrease
- Hdc – Half double crochet
- SI St – Slip stitch
- Ch – Chain
PATTERN NOTES
N.B: This pattern is crocheted in continuous round
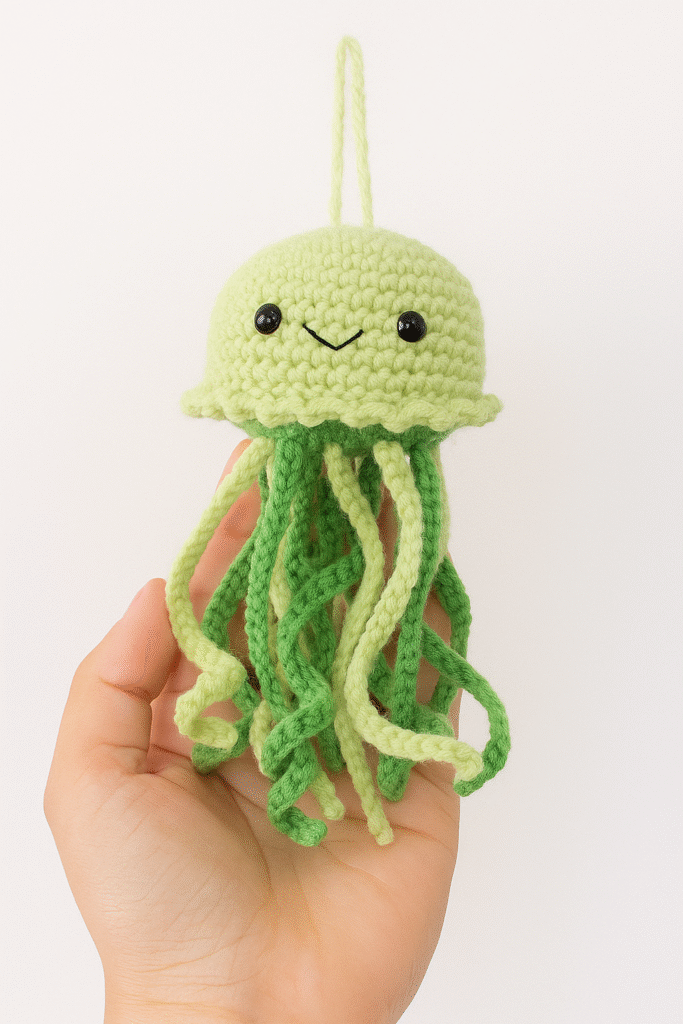
BODY
Using light green yarn,
Round 1: 6 sc in magic ring (6 sts)
R2: 2 sc in each st around. (12 sts)
R3: Sc 1, 2 sc in next st, 6 times. (18 sts)
R4: Sc 2, 2 sc in next st, 6 times. (24 sts)
R5: Sc 3, 2 sc in next st, 6 times. (30 sts)
R6: Sc 4, 2 sc in next st, 6 times. (36 sts)
R7: Sc 5, 2 sc in next st, 6 times. (42 sts)
R8-14: Sc 42.
R15: Through FRONT loops only, Sc 1, hdc 1, sc 1 in one st, sc 1 in next st, 21 times. (84 sts)
Sl st and fasten off.
Add safety eyes and stitch mouth (photo 1).

BELLY
Using dark green yarn,
Round 1: 6 sc in magic ring (6 sts)
R2: 2 sc in each st around. (12 sts)
R3: Sc 1, 2 sc in next st, 6 times. (18 sts)
R4: Sc 2, 2 sc in next st, 6 times. (24 sts)
R5: Sc 3, 2 sc in next st, 6 times. (30 sts)
R6: Sc 4, 2 sc in next st, 6 times. (36 sts)
R7: Sc 5, 2 sc in next st, 6 times. (42 sts)
Fasten off and leave a tail for sewing (photo 2).

TENTACLES: 18 TOTAL
THICK TENTACLES: MAKE 10 (5 of each color) (photo 3)

Ch 30, then sl st in 2nd ch from hook and in each ch across (29 total).
Fasten off and leave a tail.SKINNY TENTACLES: MAKE 8 (5 dark green, 3 light green) (photo 4)
Ch 24 and fasten off. Leave a tail.

JELLYFISH ASSEMBLY
ATTACHING TENTACLES (working from the center of the belly):
1- Attach the 3 skinny light green tentacles evenly around the magic ring of the belly (photo 1).

2- Next, attach 5 of the thick dark green tentacles, placing them evenly around the 3 skinny ones (photo 2).

3- Place the remaining 5 thick light green tentacles evenly around the belly (about 2 rows from the edge of the belly, photo 3).

4- Attach the 5 remaining skinny dark green tentacles, positioning them in the middle of the thick light green tentacles (photo 4).

5- Make sure to securely knot the loose strands on the inside of the belly. Trim strands (photo 5).

TO FINISH THE JELLYFISH:
- To attach the belly to the body of the jellyfish, weave the yarn needle through the last row of stitches on the belly and the back loops from R15 on the body.
- Stuff with fiberfill before closing.
| OPTIONAL: If you would like to have a hanging jellyfish, simply make one more skinny tentacle. With a yarn needle, insert it into a stitch by the magic ring and bring out on the opposite side. Tie a knot on the tail ends and trim ends. Then gently pull chain through so that the knot is hidden inside the body . |


Your writing is like a breath of fresh air in the often stale world of online content. Your unique perspective and engaging style set you apart from the crowd. Thank you for sharing your talents with us.
I am not sure where youre getting your info but good topic I needs to spend some time learning much more or understanding more Thanks for magnificent info I was looking for this information for my mission
Hi Russ,
Thank you for your comment! I am a professional crocheter, and I truly enjoy this craft. Alongside me, we have a dedicated team of professional crocheters who love sharing our thoughts and knowledge to help others.
Wonderful web site Lots of useful info here Im sending it to a few friends ans additionally sharing in delicious And obviously thanks to your effort
Hi Lonnie,
Thank you for sharing my website with your friends! I’m thrilled to hear you found the information useful. If you or your friends ever have questions or need help on any crochet projects, don’t hesitate to reach out!
Hi my loved one I wish to say that this post is amazing nice written and include approximately all vital infos Id like to peer more posts like this
Hi Selena,
Thank you so much for your kind words! I’m really glad you found the post helpful and well-written. Stay tuned for more tutorials and tips coming soon, and feel free to share any topics you’d like to see covered!
Your blog is a testament to your dedication to your craft. Your commitment to excellence is evident in every aspect of your writing. Thank you for being such a positive influence in the online community.
What a kind and thoughtful comment! Thank you so much for your support. I’m glad to know my work resonates with you.
Somebody essentially lend a hand to make significantly posts I might state That is the very first time I frequented your web page and up to now I surprised with the research you made to create this particular put up amazing Excellent job
Thank you so much for your kind words! I’m glad you found the content helpful and appreciate your support.
Your blog is a breath of fresh air in the often mundane world of online content. Your unique perspective and engaging writing style never fail to leave a lasting impression. Thank you for sharing your insights with us.
Thank you so much for your kind words! I’m really glad to hear that my blog resonates with you and provides a refreshing perspective. Your support means a lot, and I appreciate you taking the time to share your thoughts. Stay tuned for more engaging content!
My brother suggested I might like this website He was totally right This post actually made my day You cannt imagine just how much time I had spent for this information Thanks
Hi! It’s great to hear that you found the information you were looking for and that it made your day. We love hearing that our content is helpful.